
How to Zero an ACOG Sight: A Complete Step-by-Step Guide
Are you having a hard time zeroing an ACOG sight? You’re in the right place. This comprehensive guide will walk you through the proper procedure to zero your Trijicon ACOG, whether you’re running a TA31, TA11, or another model on your AR-15 or M4 platform.
Overview: ACOG Zeroing at a Glance
Advantages of ACOG Optics
- Battery-free operation – Tritium and fiber optic illumination means no dead batteries in the field
- Exceptional durability – Fixed-power prism design with no moving parts holds zero through abuse
- Built-in BDC reticle – Once zeroed, ranging stadia lines provide holdovers out to 800 meters
- Combat-proven reliability – Standard issue for U.S. Marine Corps since 2004
Disadvantages to Consider
- Limited eye relief – Requires consistent cheek weld (“nose to charging handle” position)
- Small eye box – Less forgiving than LPVOs or red dots for rapid target acquisition
- Fixed magnification – No 1x option for close-quarters work without offset sights
- Reticle calibration – BDC is calibrated for specific ammunition and barrel lengths (M855 from 14.5″ barrel)
Understanding ACOG Zeroing
Zeroing a Trijicon Advanced Combat Optical Gunsight (ACOG) scope is essential for accurate shooting. Zeroing means adjusting your optic until the point of aim (POA) matches the point of impact (POI) at a given distance. According to Trijicon’s official documentation, the tip of the chevron reticle should be zeroed at 100 meters for proper BDC function.
“As per manual, the tip of the chevron has to be zeroed at 100 meters. Not yards.” — AR15.com Forum
Model-Specific Zeroing Information
Different ACOG models have different adjustment values and zeroing procedures:
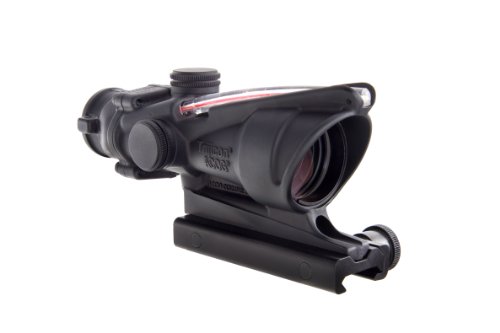
TA31 (4×32):
- Adjustment: 1/4 MOA per click (approximately 3 clicks = 1 inch at 100 meters)
- Zero using the tip of the chevron at 100 meters
- Short-range zero: Use 300m stadia line as aimpoint at 36 yards to get on paper
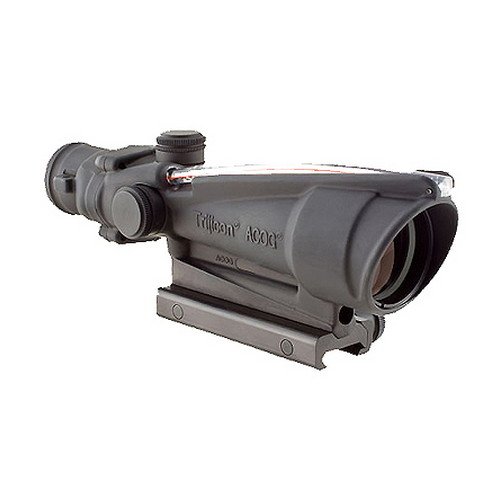
TA11 (3.5×35):
- Adjustment: 1/3 inch per click at 100 yards (3-4 clicks = 1 inch)
- Zero at 100 yards using the top of the donut reticle
- Center of donut is calibrated for 200-250 yards, bottom for 300 yards
TA31RCO-M4CP (Military Issue):
- Calibrated specifically for M855 ammunition from a 14.5″ barrel
- Different barrel lengths or ammunition will cause point-of-impact shifts at distance
Compatible Weapon Platforms
This zeroing procedure applies to:
- AR-15 rifles with Picatinny flat-top receivers
- M4 and M4A1 carbines
- M16A4 rifles
- Other platforms with MIL-STD-1913 rails
Per U.S. Army Technical Manual TM 9-1240-416-13&P, the M150 ACOG mounts directly to flat-top receivers on these platforms.
Why Choose ACOG Sights?
ACOG optical sighting systems are popular for their illuminated reticles that facilitate quick target acquisition without batteries. The dual-illumination system uses fiber optics in daylight and tritium for low-light conditions.
“The glass is super clear and it’s capable of getting the shooter out to the limit of the platform. Plus it does not ever need batteries and there are no moving parts.” — AR15.com Discussion
Reticles come in various configurations—chevrons, triangles, crosshairs, horseshoes, or donut patterns. Each reticle type has specific zeroing points, so consult your model’s manual.
What Do You Need?
To zero an ACOG, gather the following items:
- ACOG optic – Find a quality ACOG here
- Flathead screwdriver or coin – For adjustment cap removal and turret adjustments. See our scope mounting torque wrench reviews for precision mounting
- Stable shooting platform – Shooting bench, table, or prone position
- Weapon rest or sandbags – Essential for eliminating shooter-induced error
- Zeroing target with 1-inch grid – Example targets here
- Quality optics for spotting – Binoculars or spotting scope
- Ammunition – Use the same ammo you’ll carry; M855 if using military-calibrated BDC
- Non-marring tool – Plastic screwdriver handle or brass punch for seating adjustments
Steps to Zero an ACOG
- Clear and Verify Your Weapon
- Remove the magazine completely
- Pull back the charging handle and lock the bolt to the rear
- Visually and physically inspect the chamber to ensure it’s empty
- Keep the weapon pointed in a safe direction throughout
- Mount the ACOG Properly
- Loosen the thumb screws and pull the interface clamp bar back
- Position the ACOG mounting base on the Picatinny rail atop the receiver
- Slide forward until the crossbar engages a rail slot
- Hand-tighten screws first, then torque to 25-35 inch-pounds (consult your mount’s specifications)
- Critical: Ensure no rail risers are trapped under the rear edge of the ACOG base—this creates an angle that makes zeroing impossible
- Access the Adjustment Turrets
- Locate the adjuster caps on the top (elevation) and right side (windage) of the ACOG
- Use a flathead screwdriver or coin to unscrew and remove the protective caps
- Store caps safely—you’ll replace them after zeroing is complete
- Set Up Your Shooting Position
- Place your weapon rest or sandbags on a stable shooting bench
- Position your zeroing target at 100 meters (109 yards) for final zero
- Alternative: Start at 36 yards/25 meters to get on paper first, then move to 100m
- Fire an Initial Group
- Load your magazine with the ammunition you’ll use regularly
- Fire a 3-round group at the target center, using the appropriate reticle point (chevron tip for TA31, top of donut for TA11)
- Use binoculars or spotting scope to identify your point of impact
- If shots are off paper, move closer or use a larger target
- Adjust Elevation
- Measure the vertical distance from your group center to the target center
- For TA31: 3 clicks = 1 inch at 100 meters
- For TA11: 3-4 clicks = 1 inch at 100 yards
- Turn toward “U” (up) if shooting low, toward “D” (down) if shooting high
- Important: After adjusting, lightly tap the adjustment screw with a non-marring tool to seat the reticle
- Adjust Windage
- Measure the horizontal distance from group center to target center
- Turn toward “R” (right) if shooting left, toward “L” (left) if shooting right
- The arrows on adjusters indicate the direction your POI will move
- Tap the adjustment screw after making changes
- Confirm Your Adjustments
- Fire another 3-round group at the target center
- Evaluate the new point of impact
- Make additional adjustments as needed
- Repeat until shots consistently hit your aiming point
- Final Zero Confirmation
- Replace target with a fresh one
- Fire a final 5-round confirmation group
- Shots should cluster within your ACOG’s MOA specification, centered on target
- Replace adjuster caps and torque to specifications
- Record your zero data (ammunition used, conditions, click counts)
The “Tap Method” for ACOG Adjustments
One critical step many shooters miss: after making adjustments, you need to seat the reticle by tapping the adjustment screws.
“Give it a good whack with the plastic handle of the screwdriver (or other non-marring blunt instrument) after you make the adjustments. From what I have read that is the standard method of zeroing an ACOG. That’s SOP with zeroing an ACOG.” — FN Forum
This technique ensures the internal adjustment mechanism fully engages after each click. Skip this step, and you may find your zero has shifted when you verify your group.
Common Mistakes to Avoid
Mounting Errors
- Trapped rail risers – If a riser gets caught under the rear of the mount base, the ACOG will sit at an angle and cannot be properly zeroed
- Insufficient torque – Under-tightened mounts will shift during recoil, causing inconsistent POI
- Rail cant – Some aftermarket rails aren’t perfectly true; this causes the reticle to cant left or right
Procedural Mistakes
- Zeroing at 25 meters only – The short-range zero is just to get on paper. Always confirm at 100 meters for accurate BDC function
- Using wrong reticle point – Each model has a specific zero point (chevron tip, top of donut, etc.)
- Mixing ammunition – Zero with the same load you’ll use in the field. Different bullet weights change POI
- Skipping the tap – Failing to seat adjustments leads to inconsistent results
Ammunition Compatibility Issues
“The ACOG TA31RCO-M4CP’s reticle is calibrated for M855 ammunition out of a 14.5 inch barrel under standard atmospheric conditions. Any deviation from this, especially a longer barrel and/or ammunition with different BCs and muzzle velocities will cause strike errors.” — SIG 556 Forum
If you’re running a 16″ or 18″ barrel with 77-grain match ammunition, expect your BDC stadia lines to be off at distance. The 100-meter zero will still work, but holdovers will require adjustment.
Troubleshooting ACOG Zero Problems
Adjustment Knobs Feel Clicky But Reticle Doesn’t Move
Some shooters have reported adjustment turrets that click but don’t actually move the reticle. This can happen with both old and new-style adjusters. Try the tap method first—sometimes the internal mechanism needs help engaging.
If that doesn’t work, contact Trijicon directly. Their customer service is exceptional:
“Trijicon has about the best customer service. I bought a used and abused ACOG from a pawn shop, noticed the light tube was cracked, called Trijicon who never asked whether I was original owner, sent it in for ~$12, and got the ACOG back with rebuilt internals and new light tube within two weeks. No questions and no fuss.” — 68 SPC Forums
Zero Shifts After Remounting
If your zero changes every time you remove and reinstall the ACOG:
- Verify your mount is engaging the same rail slot each time
- Check torque specifications and use a torque wrench
- Consider a quality QD mount like LaRue or ADM for return-to-zero capability
Can’t Get On Paper
- Start closer (36 yards) using the 300m stadia as your aimpoint
- Use a larger target (2-foot square minimum)
- Boresight before live fire if possible
- Verify mount is properly seated and not canted
ACOG vs. Other Optics: Zeroing Comparison
ACOG vs. LPVO
ACOG Advantages:
- Simpler zeroing process with fixed power
- More durable—prism design holds zero through abuse
- No parallax adjustment needed
- Battery-free operation
LPVO Advantages:
- True 1x for close-quarters work
- Variable magnification for precise long-range holds
- More forgiving eye relief
- Better reticle options for precision shooting
ACOG vs. Red Dot
ACOG Advantages:
- Built-in magnification for target identification
- BDC reticle for distance shooting
- No batteries required
Red Dot Advantages:
- Faster target acquisition at close range
- Unlimited eye relief
- Works better for shooters with astigmatism (holographic sights)
- Lighter weight
Who Should NOT Buy an ACOG
- Shooters who primarily engage at CQB distances (under 50 yards)
- Those who struggle with consistent cheek weld
- Shooters who need variable magnification for hunting
- Budget-conscious buyers—quality alternatives exist at lower price points
Buyer’s Guide: Choosing the Right ACOG for Your Needs
By Intended Use
General Purpose (Home Defense + Range): TA31 4×32 with chevron reticle—the most versatile option with proven combat heritage.
Competition/Precision: TA11 3.5×35 offers better eye relief and clearer glass at the cost of slight magnification reduction.
Close-Quarters Emphasis: Consider the TA44 1.5×16 or pair any ACOG with an offset red dot like the RMR.
Long-Range Emphasis: TA648 6×48 for designated marksman roles, though zeroing becomes more critical at this magnification.
By Platform
- AR-15/M4 (5.56 NATO): TA31 with .223 BDC or TA31RCO variants
- .308/7.62 NATO: TA11 or TA31 with appropriate .308 reticle—see our best ACOG for .308 guide
- Budget Options: Check our best ACOG alternatives under $200
FAQ: ACOG Zeroing Questions
Should I zero at 100 meters or 100 yards?
Technically, Trijicon’s BDC reticles are calibrated in meters. However, the difference between 100 meters (109 yards) and 100 yards is minimal—about 27 feet. At typical engagement distances, this won’t significantly affect accuracy. Most ranges are marked in yards, so zeroing at 100 yards is acceptable for practical use.
Can I zero an ACOG at 50 yards?
You can use 36 yards (25 meters) to get on paper by aiming with the 300-meter stadia line. However, you must confirm your zero at 100 meters/yards for accurate BDC function. The short-range zero is only for initial sight-in.
How many clicks per inch on an ACOG?
It varies by model:
- TA31 (4×32): Approximately 3 clicks per inch at 100 meters
- TA11 (3.5×35): 3-4 clicks per inch at 100 yards
- At 36 yards: 9 clicks per inch for TA31
Always consult your specific model’s manual for exact specifications.
Why does my ACOG zero keep shifting?
Common causes include:
- Loose mount—check torque
- Mount not returning to same rail slot
- Not tapping adjustments to seat reticle
- Internal mechanism issue—contact Trijicon
Do I need to re-zero after removing and reinstalling my ACOG?
Quality mounts should return to zero. However, always verify zero after any removal/reinstallation, especially before critical use. Fire a confirmation group to ensure POA still matches POI.
Will my BDC be accurate with different ammunition?
The BDC reticle is calibrated for specific ammunition (typically M855 from a 14.5″ barrel). Using different loads will affect holdover accuracy at distance, though your 100-meter zero should remain valid. Consider keeping a data card with holds for your specific ammunition.
Conclusion
Zeroing an ACOG isn’t complicated, but it does require attention to detail and proper technique. The key points to remember:
- Know your specific ACOG model’s adjustment values and zero point
- Always confirm zero at 100 meters/yards, not just short-range
- Use the tap method to seat adjustments after each change
- Match your ammunition to your intended use
- Document your zero for future reference
If you encounter persistent issues, Trijicon’s customer service is among the best in the industry. Don’t hesitate to reach out or consult a qualified shooting instructor for hands-on guidance.
Looking for more information on ACOG scopes? Check out our other articles:
Best ACOG-Style Scopes Under $200
For a visual guide on zeroing an ACOG, check out this video: